Thursday, December 1, 2011

Google Street View Parks

Since I've already confessed my love of Globe Genie , I thought I'd post something I just heard about on Google Maps.   You can now take virtual tours of a whole host of parks and landmarks.

Here's some I stumbled across myself:

The following (and many more) can be found on Google Map helps

Tuesday, November 29, 2011

Knot Tying

In scouts we do a lot of knot tying.  The downside of this is that the parents usually have to learn them first!  I don't know about you, but squinting at a lot of knot diagrams just doesn't always help.  That's why this site, animatedknots.com, can be a huge help.  Alternately, Boy's Life magazine has some knot videos online for the more common knots.

Knots have a lot of good uses and are a great way of building motor skills.

Monday, November 28, 2011

Homemade Butter

For lactose intolerant people, we have made homemade butter puzzlingly often.  It's been a favorite activity among many groups we've been involved with though.  I must admit it is easy and fun.

If you have never tried it, here's how it's done.

You'll need:

  • 1 small container of  heavy cream
  • Disposable mini condiment container or mini plastic storage container with lid (one for each person)

Steps:

  1. Fill container with cream (or cream plus salt if you added it) about half full.  
  2. Fasten the lid securely.  
  3. Shake, shake, shake.  Don't get too vigorous.  You'll tire yourself out and it won't form any faster.  Steady shakes work best. 
  4. Some people place a clean marble in the container to speed things up

After several minutes of vigorous shaking (think butter churn), you will get a solid glob of butter and some liquid (buttermilk).   Pour off the buttermilk and use the butter right away.  If you want to make a lot of butter to use later, you need to wash it or the buttermilk residue will turn it sour.  Instructions for that can be found here.  We've never tried this, as we usually hand off our butter to someone who can eat it!


Cooking science links:

Dairy Science and Technolgy - Very detailed discussion of  butter making. Best for older students
Butter making video explains the science in a kid friendly way


Sunday, November 27, 2011

Owl Pellets

Now considering my disdain for slime, why would I recommend an activity involving rodent bones and owl vomit?  Well, simply put it's a lot more fun than it sounds (and the pellets are sterilized).

Summer campers thoroughly occupied


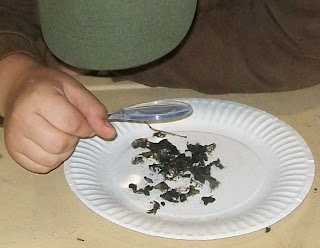
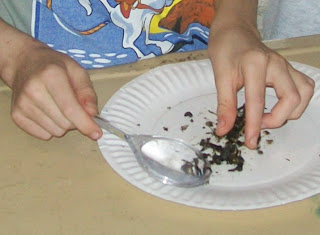
The idea is to probe the pellets for the mice or bird bones and attempt to reassemble the skeleton to find out what the owl has been eating.  Owls eat prey whole but their stomachs can't process fur, feathers and bones so those parts build up akin to hair balls in cats and the owl spits them back out every couple of days.   The resulting pellet is less disgusting than it sounds though.  I've seen even squeamish kids get over it quickly and become enthralled by the tiny little bones hidden within.

Interested? You might try the following products.

For beginners:  Student Owl Pellet Kit*
Bulk for groups: Barn Owl Pellets, 15 Pack*


*Affiliate link

Saturday, November 26, 2011

3D Snowflake

We tried this out today:

Make-a-3D-Paper-Snowflake:


Went a lot faster than I thought and looks really nice despite being a bit messy and crooked with the cuts.  It's a fairly forgiving project.   Considering we used half sheets rather than full, it is surprisingly huge, measuring about a foot across.  In light of my lifelong love of teeny origami, I might try to make some minis as Christmas ornaments.

This was recommended by a teacher friend, who says this is a favorite among her students and she ends up with a classroom full of these.

Friday, November 25, 2011

Link Post: Math Sites

Teaching Sites
Worksheets 
Math Games
Teaching methods
Online Quizzes 
Tools

Systems and Lesson Plans
Curricula

Wednesday, November 23, 2011

Junk Mail CDs

This is filed under experiments I'm not sure about yet.   

So okay, confession time.  I am a lazy crafter.   As in capital "L" Laaaazy.  If  I have to hand sew, deal-breaker time, man.  But then there's the times where I could just run over to the machine and stitch a quick line, but oh, it means getting up out of my chair and changing the thread and what do you mean I don't have a bobbin wound in this color??  So then, somehow, hand-sewing becomes an act of laziness because the sewing basket with it's already threaded needles is in reach.

So with that background;  hating to let go of shiny things, I've been hording a lot of junk mail computer CDs.  Now I've searched all over for something to do with these things that is not the re-envisioned 70s bead curtain (so much work and so many parts),  the photo frame (been there, done that), the lets cover them with stuff or paint them (but what about the shiny?)  or candle holders (because with my lazy-crafting it would be step one: place cd on table, step two: place candle on cd. done!)

So I got "creative."  (Always scary.)  Within reach was 1) cd and 2) bag of yarn


this was so worthy of a visual aid


So, I taped some yarn to the not-as-good, not-shiny side.


tape yarn to cd.  tape was in reach too. 


Randomly wind yarn around cd.  I like the purple and white. Sort of looks like a sunburst to me.


At that point I floundered.  But what is it for, I asked myself.   Christmas ornament, perhaps if you put two together so it was shiiiiny.   

But I moved on.  And found, a tapestry needle.  


 blurry visual aids plus bad brand erasure = awesome. *sigh*


weaving totally does not count as hand sewing


Hmmm


So, I guess I made a trivet?  Wouldn't be a bad one if you wove both sides, used some more contrasting yarn maybe. I'm not much of a trivet person, plus I lost all my shiny so it wasn't really what I was wanting.  It was fun to do though.  It would be a great weaving activity for a child who needs fine motor practice.

I'm just going to leave this here and hope it inspires brilliance in someone else.  If you do get a brain wave from this, let me know.  I'd love to see it. 

Tuesday, November 22, 2011

Museum Exhibits: Miniature White House

A must-see US exhibit that makes of the round of presidential libraries and local museums is the Miniature White House.   We caught it last spring and it has to been seen to be believed. (And I took several dark, blurry photos of it. )

See photos of it here and here.   The facebook page of it's permanent home is here.

And a handy video from one of stops:


Monday, November 21, 2011

Slime

Who doesn't love slime?


ooey gooey science-y


**raises hand**

But it's inevitable isn't it?   I do recall getting slime out of gumball machines as a kid.  On purpose.  It seemed to the thing to do at the time.  There are two main varieties of slime: polymer and non-Newtonian fluid. So if your little grossologist must have slime, here's how to do it.


Polymer slime aka borax and school glue (pictured above):

Polymer Slime instructions
Science-y Explanation

Note: This is my favored slime.  It's not all that slimy, it keeps for a while in a baggy or my least favorite plastic storage container, and it generally cleans up and behaves itself.


Non-Newtonian slime aka cornstarch/corn flour(UK) and water:
Instructions plus science
A page with lots of silly cornstarch slime vids

Note: This stuff is a menace.  When it's being a liquid, it gets everywhere, it feels disgusting, and will destroy plumbing quick as anything.  When you clean up, use a bucket, outside if possible.  You need to thin the cornstarch/corn flour to nothing before it ceases it's starchy mayhem.

Sunday, November 20, 2011

Home Made Instruments

We made this one for a scout merit badge a while ago so I have no in progress pictures, but it's pretty straight forward fortunately.   I don't recall where we first read about this, but it is loosely based on an ancient Egyptian instrument called a Sistrum.  (For a history check here. )

I was feeling a little lazy that day so when we found a similar project on Family Fun, we went with a more naturalistic version of that. 


Materials:

  • a stick with a "V" end and "handle" end that fits comfortably in your hand
  • wire or heavy gauge fishing line
  • an assortment of metal bottle caps
  • a hammer and a surface to pound on - scrap wood, brick etc.
  • an awl or ice pick

Steps:
  1. Remove any bark and extra twigs from the stick and sand it smooth
  2. Flatten bottle caps with a hammer.  (Yes, kids can do this and they'll love it.  Just stand out of firing range and have them use a two handed grip for more control and to keep fingers out of the way.)  You may want to use eye protection just in case.  We managed to flip a couple of caps some distance.
  3. Carefully punch a hole in the center of the each bottle cap with the awl.  Surprisingly, for us there was less mayhem involved in this step than the hammering one.  Just use your best judgement on who does this step.  It depends on the child.  
  4.  (Optional ) use a file to smooth the edges of the holes.  Some of them can be sharp.
  5. Using wire or fishing line, string the bottle caps like beads and tie or twist (if wire) the ends between the crook of the stick, hammock-like.  You can secure with glue or hot glue if you like.  


You could customize this basic design any number of ways:

  • paint or stain the stick
  • punch hole in the caps but don't flatten and place them top to top as you string them to change the sound.
  • use more than one string of caps 

That's it!  Shake the stick and you have a jingly percussion instrument.  (Though, I did find a video on the official way to play a sistrum.)


As a bonus, I found this today online:  A homemade kazoo from paper tubes

Saturday, November 19, 2011

Math Tales

I could spend all day watching this channel .

Note: While some of these are better suited to older kids (if you actually expect them to under the concepts behind them) they do have plenty of younger kid appeal to those in to drawing.

Möbius strip story:


Fractal Doodles!! X2  (Yes, someday I'll get over fractals, I promise. )


In truth, I obsess over these things, because I love mathematics but I hate arithmetic.  And the fact that we don't commonly know the difference is the tragedy of math curriculum.

Friday, November 18, 2011

Three Ways to Appreciate Fall Colors

1) A fall leaf "bouquet."  Gather enough in a bud vase and they will look like a flower.  Choose the freshest you can find because they only last about a day even with water.


3) The classic leaf rubbing.

Thursday, November 17, 2011

Rock Candy recipe

So to recap, we read a lot instructions online for making sugar crystals.  We figured there's no beating science you can eat.   I found there were a variety of comments on some of the posts ranging from "it so easy!"  to "it didn't work at all."

We scrubbed an empty spaghetti sauce jar since it seemed like a good size for a long string of sugar.   I considered using string as many of the recipes stated, but it seemed very unappetizing.  Having eaten a great deal of  commercial rock candy on sticks, I decided skewers were the way to go.

Then I found the secret to successful rock candy-making in a couple of vids and comments.

  1. Soak the skewer in water for a few minutes.  
  2. Coat the skewer in sugar or in the sugar syrup you are about to make.   I'd recommend using the syrup because that worked well for us.
  3. Let the sugar syrup cool and harden a bit on the skewer.  You don't have to wait too long.  My son was too impatient to let it sit too long.

For the syrup I based it on  this recipe.
  • 3 cups (384g) of sugar
  • 1 cup (128g) water
  • 1/2 tsp (2ml) vanilla extract 
  • a few drops of blue food coloring
Then:


  1. Bring the water to a boil in a pot
  2. Important:  add sugar slowly.  We (well, I say "we" but...) ended up dumping it all in and there was a lot of sugar that collected at the bottom.   If you add slowly you can see the moment the water is saturated because the sugar will fall to the bottom and no longer melt into the water.
  3. Make sure you keep stirring so that the sugar doesn't burn or caramelize.
  4. Once your water is saturated, remove from heat and use it to prepare the skewers as stated above.
  5. Add the vanilla and food coloring.
  6. Let the sugar syrup (or solution) cool.  We didn't put it in the fridge and we didn't wait until the recommended temp (again -impatient).
  7. Pour the sugar water solution into the jar.  A funnel might help with this.
  8. Set one or two prepared skewers in the jar.  If you use two make sure they don't touch below the waterline.
Now at this point in all the directions I read, they fussed a lot about not letting the skewers or string touch the bottom or side of the jar.  Nothing we did prevented that, so we eventually gave up and them rest on the bottom and lean against the jar sides.  We did cross the skewers at the neck of the jar and rubber band them together so they wouldn't touch each other. Then you need to cover the jar with plastic wrap or something to keep anything from falling into the open jar and any curious sugar-happy critters out.


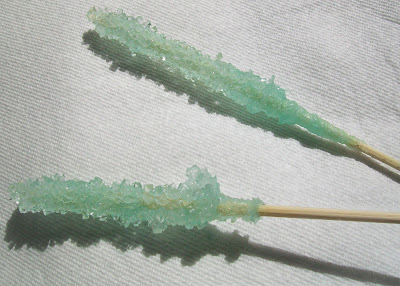
Then you wait.  And wait.  We waited for two weeks.  Then we had these:

And they were very, very yummy.  And gone in minutes.

Tips: 
  1. What no one tells you straight out is that, (stop and think about it) you are making a syrup that will be gooey, messy and somehow get everywhere. Also, much sugar may be wasted  in the process.  
  2. Two few crystals may not be your problem, but too many may.  Our jar kept crusting over on top.  I elected to break them up and give the jar a gentle swirl so the crystals would form on the skewers and not on the surface.

Next time I may try a wider necked jar and several more skewers.  We got busy and failed to make use of the remaining syrup so it ended up being tossed unused.  I think we could have easily had enough solution for twice as much candy goodness.

Tuesday, November 15, 2011

Rock Candy

Next Project:  Rock Candy


To start we used these instructions for our reference starting point.


What we learned.


  1. It's a lot easier than you think
  2. Skewers not string
  3. You will waste a lot of sugar until you get the hang of it
  4. It takes time and patience
  5. Vanilla extract + sugar is awesome
  6. Food coloring is fun but not necessary


Watch this space for details in a day or two.

Monday, November 14, 2011

Theme for the Day: Fractals

Remember my earlier post on fractals?   Well, I'm truly hopeless at this point, so I need to share my obsession.

So what are fractals anyway?
Wiki says:  a rough or fragmented geometric shape that can be split into parts, each of which is (at least approximately) a reduced-size copy of the whole, a property called self-similarity.
Well (for the non math people like me) that basically that means layers of repeated shapes that can be calculated by a formula.  But you don't need a formula to enjoy them.  Check these out:


Ready to make your own?  Try these cool (free!) online generators:
  • "Snowflake" style - design your fractal with five straight lines
  • Cool Math has five
  • Easy Fractal Generator lets you draw a Julia or Mandelbrot set (or a custom one if you are mathematically inclined) and lets you export your finished work to a file for printing.  Nice.
  • This generator is similar to the snowflake one above but lets you overlap fractals and export the finished work
  • Sierpinski Triangle
Hands on and fun links for the younger kids:


For the older kids and the lesson planners:

Downloads
  • A caltech worksheet for the Sierpenski Triangle. Notice! This is a word doc that will want to immediately download.
  • A PDF worksheet on fractal math from fractalmath.com, advanced HighSchool+
  • A PDF worksheet from Randoff College for grades 5-8
  • Open Source software to download. Note: I have not trialed, so use at your own risk.
  • A trial copy of (not-free) fractal software. Note:  I have not trialed, so use at your own risk.

Sunday, November 13, 2011

Link post: Educational Videos

My son always does better with multi-sensory learning.  We've found that videos that go with our lessons are always helpful for his understanding of concepts.   I've found several sites that host usual educational videos.  Of all of these resources are free.

Saturday, November 12, 2011

I love everything about this video


Though I'm amazed (and jealous) by what this school allows.   Whacking each other with faux swords?  Climbing around on a picnic table?   Say it ain't so!  /sarcasm

My son's former school has banned that oh-so-dangerous, uber-violent game known as "Tag."

*Sigh*

I seriously wish I could do something like this on a smaller scale for my cubscouts.  Hmmm.


Friday, November 11, 2011

Treehouse Part 5

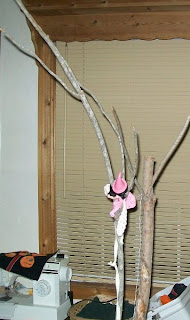
And finally the completed tree house.

The Treehouse

As you can see we had a last minute addition.

The sunshade


Once all the constructing and gluing was done, Junior thought something wasn't quite right.  What about all the sun up in a tree?  What we really needed was a roof; or better yet, a canopy.  So we went digging through the fabric scraps and found a length of muslin.   But the trouble was how to fasten it.  In a burst of inspiration, Junior grabbed a handful of pipe cleaners/chenille stems and made a complicated support structure for the roof.  Then using a combination of more pipe cleaners, glue and rubber bands, we secured the canopy on.

Success.  One treehouse and one happy doll.


Close up of lower platform 
and climbing rope.


Now for lesson planning, here's what we counted.


  • Art:  architecture, design, color, 
  • Math: measuring,  addition, subtraction, ratios, scales
  • Writing:  journaling, project planning notes, final project write up, success of plan, modifications made
  • Science: structural engineering,  


 Still trying to squeeze the whole tree in one photo


Thursday, November 10, 2011

Treehouse Part 4

So back to the treehouse.  So we had glued in the top platform and decided it was way too far off the ground for a ladder to reach.  The length it was already caused it twist under our model child.  So we added a lower platform and fasten the bottom of the ladder to it.  Junior also decided that safety rails were a must so we added those as well.   We tied a strip of cloth beside the bottom platform as a climbing rope from the ground.


Lower platform, rope ladder and climbing rope.


Junior had discovered the sewing machine just before the treehouse project.   I showed him how to make simple, tiny pillows and he measured fabric against our treehouse doll and sewed several for the treehouse on his own.


Piles of pillows


pillows on the upper platform


We had just done a scout craft with melty beads and we still had them at the house, so Junior decided the treehouse needed a melty bead TV set.


Doll with her pillows and the "TV."


Next time:   The completed treehouse.

Wednesday, November 9, 2011

Fractals Have Taken Over

What started out as an attempt to combine art with math for a fabulous home school assignment, ended up a little bonkers. It was innocent enough at first with paper and scissors and colored in Sierpinski Triangles.

Then I found this site.  (Also check out the enlargements of those beautiful models shown mid-way down and then scroll all the way to the bottom of the page and look at those too.  Wow!) My first thought was wow, soda cans! My second thought was er, soda cans? Mathematicians are sorta scary.

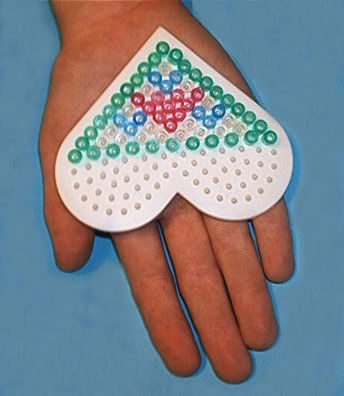
And yet, I figured, we could do that. (Maybe not with soda cans though.)  At first, I thought of cut up drinking straws.  I cut three of them into little pieces and realized that was way too much work.  Then I thought, melty beads! Someone had donated a ginormous pack and the associated hardware to the scouts. Hmmmmm.

Yeah, well, I'll spare you the rest of the thought process and skip to the end.


Ta Da!

Not perfect, I know, but the little points don't quite line up right.  Might try the square frame with a Sierpinski carpet next.  Yeah, clearly homeschooling is sending me over the edge.


ETA:  Eliminating bottom-most row of clear beads and putting the aqua frame beads in their place seemed to fix the problem.  I'm sure a mathematician could tell me why this is but I don't think I want to know. ;-)


(Sorry, the treehouse should be continued tomorrow.  I didn't have time to get all my photos together for today's post)

Tuesday, November 8, 2011

Treehouse Part 3

So we had our tree, next it was on to the platforms.

We constructed two of the standard "raft" sort of platforms out of craft sticks/Popsicle sticks fitting them into the spaces between our branches.  We picked up some bass wood* pieces to help brace the platforms against the branches wherever we could.

Building the Platforms


Upper Platform test fitting

Now here's where our math came in.   We used the easy 1:1 dollhouse scale (1 inch = 1 foot) for calculating our sizing and even had our scale model child.

"We wish to welcome you to Munchkin Land!"


Then we had a brilliant idea; make a tiny rope ladder.  We looked at real ladders and determined that rungs are about one foot apart. So it seemed easy enough: tape toothpicks to a ruler, knot some string onto each, a drop of glue to make everything stay put.  

Well...

Those tiny knots were awful and traumatic.  Keeping the string taut as you tied the knot was even worse. And the rungs kept ending up glued to the paper.  But, in the end, we had a ladder.


It's all fun and games until you glue yourself to a toothpick.


Ladder drying on tree and lower platform in progress


Clearly, the Lullaby League found it all very tedious.


We decided they had the right idea and went to 
do a little *ahem* research.


Next time, everything glued will be in place and the fun part; decorating!


*affiliate link

Monday, November 7, 2011

Treehouse Part 2

So the first step is making the "tree," by attaching the sticks to the stump.  The instructions show a half a stump, but Junior liked the look of the intact stump and we were all for less cutting.


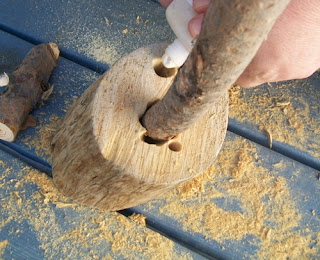
So first we made sure the sticks were level enough to stand up, knowing they did not need to be perfect.  Then the DH began to drill two holes in the stump.  A paddle bit would have been easier but he made do with large boring bit.


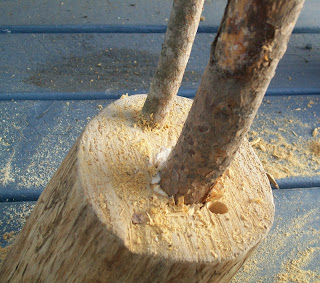
Because of the guesswork involved with the drilling, we had some large gaps to deal with.


We decided to pour in a small amount of wood glue, fill the gaps with the readily available sawdust, then pour glue on top and press the mixture in. 


It was messy, but it worked surprisingly well.  By the time we were  finished all the drill holes were nicely concealed and we  were able to sand things fairly smooth again.  It did also serve to make sticks very securely fastened to the stump.

Next time:  the treehouse.

Sunday, November 6, 2011

The Treehouse

I've been meaning to blog here about the Great Treehouse Project but somehow never managed to get the photos organized or set it all down in steps.

So anyway - the backstory:

I had long been enthralled with with this site but I hadn't quite got up the energy to start the project with my Cubscouts.  Then as we were moving out our school and into homeschool one of the moms proposed this project for the class.  I was immediately all over that and it became our first homeschool project.


It all started with

A Stump


and two sticks....


To be continued......

Saturday, November 5, 2011

Globe Genie

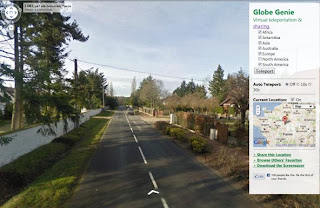
If you you've never heard of Globe Genie, you are missing out.  It's a neat little app using Google Street View first developed at a university and later spun into it's own site.   I don't even recall where I first ran across it, but I loved it immediately.  It can be a lesson in social studies, cultural and/or physical geography or just a really fun pastime.


Road tour of the French countryside

Road tour of the M27 near Southhampton, UK


When you arrive at the landing location, simply click all the continent boxes for the most varied journeys and click "Teleport."   Be sure to encourage "traveling"  in each destination; click down the roads, zoom in on the buildings and scenery.


You can find some ideas for building a lesson plan for this activity here.


I went for the cultural geography angle and made a worksheet with the following:


Travel to four locations. For each answer the following questions:


  • Address:
    • State/Country
  • Describe the following: 
    • Type of buildings:
    • Plants:
    • Animals:
    • Rural/Suburban/Urban:
    • Vehicles:
  • What details stand out for you?
  • How does this location differ from where you live?
  • How is it similar?
  • How far away from you?


After all four trips are taken and the questions answered, evaluate the journey.
  • How do these locations differ from each other?
  • How are they similar?
  • Which location is the most similar to where you live?
  • Which location is the most different?
  • Which location is the farthest away?
  • Which location is nearest?
  • Which location would you like to visit most and why?


Happy travels!  How will you use Globe Genie?